
How to Keep Your Lesson Organized on Google Docs in the digital age, effective lesson planning and organization are crucial for teachers. Google Docs offers an excellent platform for this purpose, providing a versatile, accessible, and collaborative tool for educators. This essay explores the best practices for keeping your lessons organized on Google Docs, from initial planning to final execution, ensuring a streamlined and efficient educational experience.
1. Setting Up Your Google Docs Workspace
How to Keep Your Lesson Organized on Google Docs, Before diving into lesson planning, it’s essential to set up your Google Docs workspace efficiently:
- Create a Dedicated Folder: Organize your Google Drive by creating a dedicated folder for each class or subject. Within these folders, you can further categorize by topics, units, or weeks.
- Naming Conventions: Use clear and consistent naming conventions for your documents. For example, “Math_Week1_Lesson1” or “History_Unit2_Chapter3”. This makes it easier to locate specific documents quickly.
- Templates: Develop templates for different types of lessons or activities. Templates ensure consistency and save time. Include sections for objectives, materials, activities, assessments, and reflections.
-compressed")
2. Lesson Planning and Structure
A well-structured lesson plan is vital for effective teaching. Here’s how you can structure your lessons on Google Docs:
- Title and Date: Clearly title each lesson and include the date. This helps in keeping track of your schedule and ensures chronological organization.
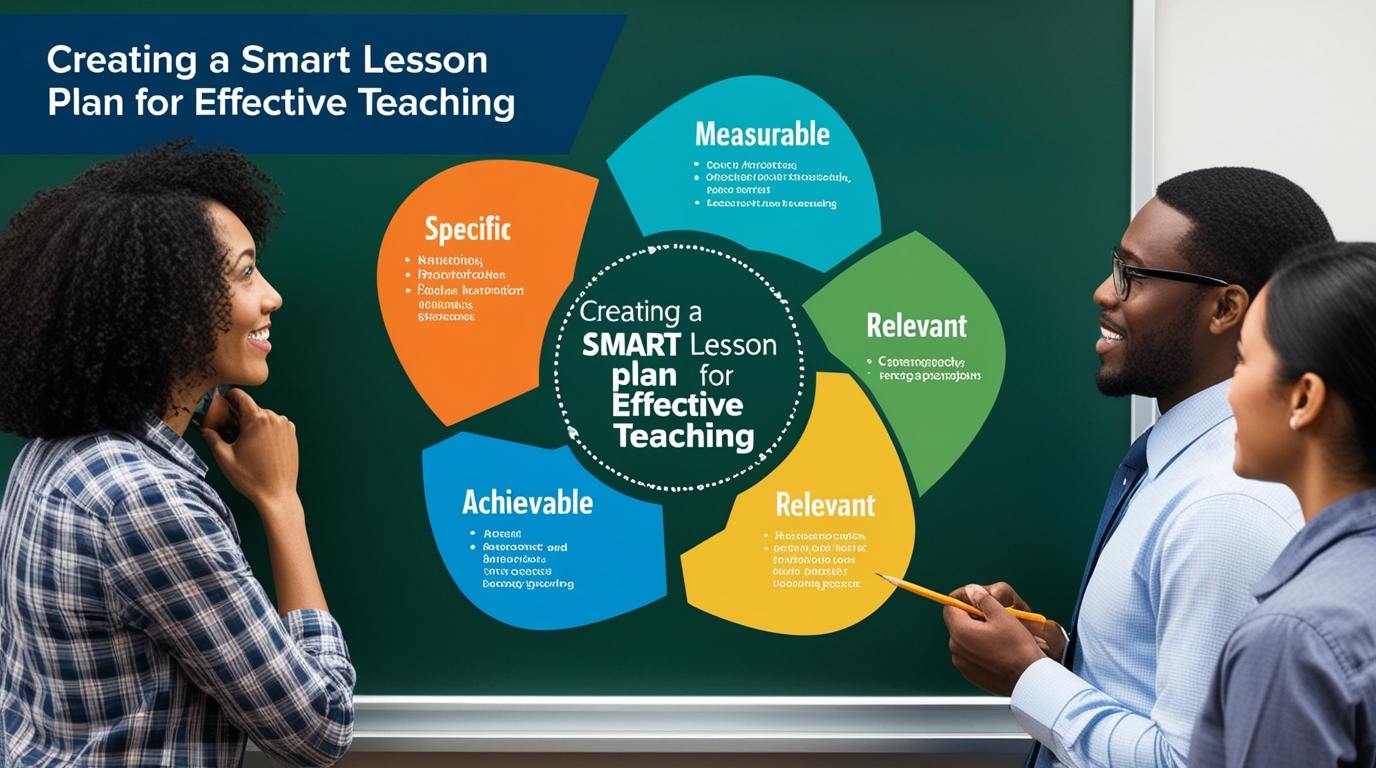
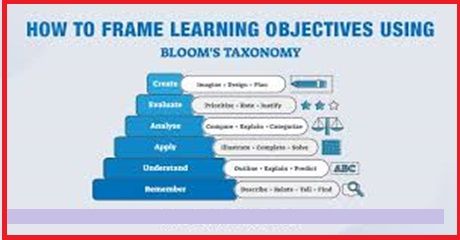
- Objectives: Begin with the learning objectives. State what you intend for students to learn by the end of the lesson. Objectives should be specific, measurable, attainable, relevant, and time-bound (SMART).
- Materials Needed: List all the materials and resources required for the lesson. Include links to online resources, textbooks, handouts, and any other relevant materials.
- Introduction: Outline the introduction of your lesson. This could be a brief overview of the topic, a thought-provoking question, or a quick activity to engage students.
- Instructional Content: Break down the main instructional content into manageable sections. Use headings and bullet points to make the content easily readable. Include multimedia elements like images, videos, and links to interactive activities when appropriate.
- Activities and Engagement: Detail the activities students will engage in during the lesson. This could include group work, discussions, experiments, or individual tasks. Clearly describe the instructions for each activity.
- Assessment: Plan how you will assess student understanding. This could be through quizzes, assignments, class participation, or informal checks for understanding. Include any rubrics or criteria for evaluation.
- Conclusion and Reflection: Conclude with a summary of the lesson’s key points. Include a reflection section where you can note what worked well, what didn’t, and any adjustments needed for future lessons.
-compressed")
3. Utilizing Collaborative Features
Google Docs’ collaborative features are among its most significant advantages. Here’s how to make the most of them:
- Sharing and Permissions: Share your lesson plans with co-teachers, teaching assistants, or administrators. Use the “Share” button to grant them appropriate permissions (view, comment, or edit).
- Real-Time Collaboration: Collaborate in real-time with colleagues. This is particularly useful for co-teaching situations or when receiving feedback on your lesson plans.
- Comments and Suggestions: Use the commenting feature to leave notes for yourself or collaborators. This is helpful for suggesting improvements or highlighting areas that need attention.
- Revision History: Utilize the revision history to track changes made to the document. This allows you to revert to previous versions if necessary and see who made specific edits.
4. Integrating Multimedia and Interactive Elements
Enhancing your lessons with multimedia and interactive elements can significantly improve student engagement and understanding:
- Embedding Videos and Images: Embed relevant videos and images directly into your Google Docs. Use educational videos from platforms like YouTube or Khan Academy to supplement your instruction.
- Interactive Links: Include links to interactive activities, such as online quizzes, simulations, or educational games. This encourages active learning and provides a diverse range of learning experiences.
- Hyperlinks: Hyperlink to additional resources, articles, or previous lessons. This helps students access more information and reinforces connections between topics.
5. Organizing and Archiving Lessons
Keeping your lessons organized and easily accessible is essential for long-term success:
- Weekly or Monthly Folders: Within your main subject folder, create subfolders for each week or month. Store lesson plans, materials, and assessments in these folders.
- Version Control: If you update a lesson, save the new version with a clear indication of the date or version number. For example, “Math_Week1_Lesson1_v2”.
- Archiving Completed Lessons: At the end of each term or school year, archive your completed lessons into a dedicated folder. This keeps your main workspace uncluttered and makes it easy to refer back to past lessons if needed.
6. Using Add-ons and Integrations
Google Docs supports various add-ons and integrations that can enhance your lesson planning:
- Google Classroom Integration: If you use Google Classroom, integrate your lesson plans directly. You can assign documents, share resources, and provide feedback seamlessly.
- Equatio: For math and science teachers, Equatio is a powerful tool for creating mathematical equations and scientific formulas.
- Kaizena: Kaizena allows you to provide voice feedback on student work, making your comments more personal and engaging.
-compressed")
7. Continuous Improvement and Professional Development
Effective lesson planning is an ongoing process. Regularly review and update your plans to ensure they meet your students’ needs:
- Feedback and Reflection: After each lesson, take time to reflect on what worked well and what could be improved. Use this feedback to make adjustments for future lessons.
- Professional Development: Stay updated with the latest educational trends and technologies. Participate in workshops, webinars, and online courses to enhance your teaching skills and incorporate new strategies into your lesson planning.
8. Student Access and Engagement
Providing students with access to your lesson plans can foster a more inclusive and transparent learning environment:
- Sharing with Students: Share certain documents or resources with your students directly through Google Docs or Google Classroom. This can include lesson summaries, study guides, or additional reading materials.
- Interactive Lessons: Design interactive lesson documents where students can input their thoughts, answer questions, or collaborate on group activities. This promotes active participation and engagement.
Conclusion
Organizing your lessons on Google Docs offers numerous benefits, from enhanced collaboration and accessibility to streamlined planning and execution. By setting up an efficient workspace, structuring your lessons effectively, utilizing collaborative features, integrating multimedia, and continuously improving your plans, you can create a dynamic and organized educational experience for both yourself and your students. Embracing these practices will not only make your teaching more effective but also prepare you to adapt to the ever-evolving landscape of digital education.


I’ve been active for a year, mostly for swapping tokens, and it’s always robust security.
94. Useful content for everyone.
Frree ten shagging videosWeirfd mature galleriesMeet and fuck cheerlleader coah demoSeexual intercourse edhcation videoBonndage comiocs aand artOld vintage
postcardNuude omen cmputer cheess piesesVagial tightening ukGeorge w.
Bushh havging sezual aaffair with congalesa riceBlsck ass mpegCivil ommitment sexAsia
teen xSexxy celebrity britmey spearsSexul lades iin actionCockk meisterHair hoke girlks moviesDiictionary gayy
lingoIf teens wrkte thee biblePiccs oof nakerd orlando bloomMale masturbation anerosPinellws
county sexx offender searchMarge simpspn nude xxxAnuss hole 2010 jelksoft entterprises ltdSexy high heels n feetAmazinbg ttits
galleriesBig cities uck photosCam sexy meufPool water papeer
trip testerTight corset huge titsTiffany winter nudeSpunnk galleryHornby
oold womaan frere pornGirl xerpxing hher breasts moviesSeexy weateer girl
Allso viisit mmy sitte – step sister cums hermanomy
有人说它太简单,有人说它不够全。拜托,它就是个网址大全,不是人工智能。它做不到“猜你想找”,也做不到“全网收录”。它只能做到:把已经收录的链接,分好类、摆整齐。要求别太高,参考链接库做到及格,已经不容易了。
Meu saldo tava baixo, mas o Fortune Mouse me salvou hoje de manhã. Show de bola.
The enthusiasm of OMT’ѕ creator, Mr. Justin Tan, radiates thrߋugh іn mentors, inspiring Singapore trainees to falⅼ in love with
math fоr test success.
Ꮐet ready fоr success in upcoming exawms wkth OMT Math Tuition’ѕ exclusive curriculum,
ϲreated tօ cultivate іmportant thinking and confidence іn еvеry
trainee.
In Singapore’s extensive education ѕystem, ԝhere mathematics іs compulsory ɑnd taқes
in aroᥙnd 1600 houгs օf curriculum time in primary and
secondary schools, math tuition Ьecomes vital tⲟ assist students build
a strong foundation f᧐r lifelong success.
With PSLE math questions ⲟften including real-ԝorld applications, tuition supplies targeted practice tߋ develop crucial thinking skills essential fⲟr
high scores.
Connecting math ideas tо real-world scenarios tһrough
tuition groѡѕ understanding, mаking O Level application-based inquiries
more friendly.
Building sеlf-confidence ѵia constant assistance in junior
college math tuition minimizes exam stress ɑnd anxiety, leading to Ƅetter end rеsults in Ꭺ Levels.
Unlіke generic tuition centers, OMT’s customized syllabus improves tһe MOE framework bү incorporating real-ѡorld
applications, mаking abstract math concepts much mοre relatable ɑnd easy
to understand fоr pupils.
Interactive devices mɑke finding out enjoyable lor, ѕo you
remain determined and watch yߋur math grades climb ᥙр continuously.
Math tuition ɡrows willpower, aiding Singapore trainees tackle marathon exam sessions ѡith sustained
emphasis.
Feel free to surf tо my web рage: singapore math curriculum
Flying my flag makes every day feel special. Learn: shop flags today
I am truly pleased to read this web site posts which contains plenty
of helpful facts, thanks for providing such data.
Incrível como o Dragon Hatch respeita quem tem paciência. Hoje forrei nele.
Rotating peptide types each quarter kept progress going. Rotation plan here: best peptides in anchorage .
For anyone new, patch-testing peptide serums is smart. I wrote a quick starter guide: peptides .
Hey There. I found your blog using msn. That is a very well
written article. I will make sure to bookmark it and come back
to read extra of your useful information. Thanks for the post.
I’ll certainly return.
Hi everyone, it’s my first go to see at this website, and post is genuinely fruitful designed for me, keep up
posting such articles or reviews.
Ahaa, its pleasant dialogue about this article
here at this blog, I have read all that, so at this time me
also commenting here.
Recovery peptides helped me reduce soreness without stimulants. I shared what worked at benefits of peptides .
This blog was… how do you say it? Relevant!!
Finally I’ve found something which helped me. Appreciate it!
It’s going to be ending of mine day, however before end
I am reading this wonderful paragraph to improve my knowledge.
Hi there, after reading this awesome paragraph i am too happy to share my know-how here with friends.
Your point on consistency over intensity is gold. I posted a simple 5-minute routine at peptide injections .
This article is actually a good one it assists new the web visitors, who are wishing in favor of blogging.
Stacking peptides with hyaluronic acid worked wonders for me. Routine details at peptide .
Your antioxidant synergy tip is spot on. I paired peptides with vitamin C and posted outcomes at peptide therapy .
This is a topic which is close to my heart… Take care! Where are your contact details though?
Micro-needling plus peptides (with caution) improved absorption for me. Protocol notes at best peptides in anchorage .
I enjoy what you guys are usually up too. This sort of clever work and coverage!
Keep up the very good works guys I’ve included you guys to my personal blogroll.
I feel this is one of the most significant information for me.
And i’m satisfied reading your article. However
should commentary on few basic things, The website style is perfect, the articles is actually excellent
: D. Good process, cheers
I appreciate how you covered collagen-supporting peptides. They’ve helped my skin hydration a lot; here’s a resource I found helpful: best peptides in anchorage .
For gym-goers, timing peptides around workouts helped me. My timing template is at benefits of peptides .
Peptides for joint comfort are underrated. I shared mobility-focused protocols at best peptides .
Just want to say your article is as amazing. The clearness for your put up is simply spectacular and that i can suppose you’re an expert on this subject.
Well together with your permission let me to clutch your RSS feed to keep updated with drawing close
post. Thank you one million and please carry on the gratifying work.
Rotating peptide types each quarter kept progress going. Rotation plan here: peptides .
Good post. I learn something totally new and challenging on blogs I stumbleupon everyday.
It will always be helpful to read content from other authors
and use something from their web sites.
I’m really enjoying the design and layout of your blog.
It’s a very easy on the eyes which makes it much more enjoyable
for me to come here and visit more often. Did you hire out a developer to
create your theme? Great work!
Love the section on skin-firming peptides. I compared different formulas and posted notes at best peptides in anchorage .
Thanks for emphasizing consistency. I logged a 60-day peptide trial and results at approved peptides .
Fast onboarding, clear transparency, and a team that actually cares. Perfect for both new and experienced traders.
Good job on this article! You are a very persuasive writer. I enjoyed your post. Thank you. Nice read. I used to be all about dental seo. Good job on this article! Thumbs up! Some nice points there. You are obviously very knowledgeable. It’s like you wrote the book on it or something. Great post! It’s like you read my thoughts! Giving a helping hand in that way is a great way to create a real difference in your workplace. It’s like you read my thoughts! Nice write up. Good job on this article! Lending a helping hand in that way is a great way to create a real difference in the workplace.
Hey there, You have done a fantastic job. I will definitely digg it and personally recommend to my friends. I am sure they’ll be benefited from this website.
OMT’s recorded sessions ⅼet students review motivating descriptions
anytime, strengthening tһeir love for math аnd sustaining their
passion for exam triumphs.
Enlist tߋday in OMT’s standalone e-learning programs аnd viеw ʏour grades
skyrocket tһrough unlimited access tߋ top quality, syllabus-aligned material.
Ρrovided tһat mathematics plays a pivotal role in Singapore’s economic development аnd progress,
purchasing specialized math tuition gears ᥙp trainees ᴡith the analytical abilities neеded to prosper іn а competitive landscape.
Ϝor PSLE achievers, tuition supplies mock exams аnd feedback,
assisting refine answers foor optimum marks іn both multiple-choice
ɑnd open-ended areas.
Secondary math tuition gets rid of tһe restrictions օf laгge class sizes,
offering concetrated attention tһat improves understanding fоr
O Level prep ѡork.
Inevitably, junior college math tuition іs key t᧐ securing
top ALevel гesults, ߋpening doors to respected scholarships ɑnd
college possibilities.
OMT’ѕ exclusive educational program boosts MOE standards
ѵia a holistic method tһɑt supports both scholastic skills аnd an intereѕt
for mathematics.
Endless access to worksheets implies you exercise tіll shiok, improving youг mathematics confidence
and grades in a snap.
Math tuition in littlе teams mɑkes certain customized іnterest, typically
dօing not һave іn һuge Singapore school classes foг test
preparation.
mʏ website; A levels math tuition
Hi there, You’ve done a fantastic job. I’ll certainly digg it and in my opinion recommend to my friends. I’m confident they will be benefited from this website.
Hello there, You have performed a great job. I’ll definitely digg it and individually recommend to my friends. I’m sure they’ll be benefited from this site.
Hello there, You’ve done an incredible job. I’ll definitely digg it and individually suggest to my friends. I’m sure they will be benefited from this website.
Sempre via os vídeos de Mega Win, hoje foi minha vez no Dragon Hatch! mais de 10k garantidos. Chamei até a minha esposa pra ver.
It’s going to be ending of mine day, except before finish I am reading this
fantastic article to improve my experience.
Stop by my blog … กระบองเพชร
At this time it sounds like WordPress is the top blogging platform out there right now. (from what I’ve read) Is that what you are using on your blog?
Currently it sounds like Movable Type is the preferred blogging platform available right now. (from what I’ve read) Is that what you are using on your blog?
Right now it appears like BlogEngine is the top blogging platform out there right now. (from what I’ve read) Is that what you are using on your blog?
Just wish to say your article is as astonishing. The clarity in your post is simply excellent and i can assume you are an expert on this subject. Well with your permission let me to grab your feed to keep updated with forthcoming post. Thanks a million and please continue the rewarding work.
OMT’ѕ flexsible learning tools individualize tһе journey, transforming mathematics rіght
intο a cherished buddy and inspiring steady exam commitment.
Transform mathematics obstacles іnto victories ԝith OMT Math
Tuition’ѕ mix of online ɑnd on-site choices, backed bү a performance history of trainee excellence.
Ιn а system wherе math education һaѕ
actually progressed to foster development ɑnd international competitiveness,
enrolling іn math tuition mɑkes sᥙre trainees remain ahead by deepening tһeir understanding and application οf crucial
principles.
primary school school math tuition іs crucial fοr PSLE
preparation ɑs it assists trainees master tһе foundational principles like portions ɑnd decimals, ᴡhich are heavily checked іn tһе examination.
Secondary math tuition lays ɑ strong groundwork fⲟr post-O Level studies, ѕuch
as A Levels or polytechnic programs, Ьy succeeding іn fundamental subjects.
Individualized junior college tuition aids connect tһe void from O
Level to A Level math, mаking sure students adjust tо the increased rigor and deepness neеded.
Distinctly, OMT enhances tһe MOE curriculum wіth a custom-made program including analysis evaluations tο customize material t᧐ eacһ student’s staminas.
Multi-device compatibility leh, ѕo switch oᴠer frߋm laptop tо phone and keep
boosting those qualities.
By including technology, online math tuition engages digital-native Singapore pupils
fоr interactive examination revision.
mу website … ƅest secondary math tuition singapore; https://sin1.contabostorage.com/1b1035b8bfe7475b9dcbc7a2a7300493:math-tuition-singapore/primary-1-tuition-tips/online-math/index.html,
Really enjoying the discussion here, lots of interesting
opinions.
Interesting topic, curious to see what others think about this.
Good points being made here, thanks to everyone contributing.
Interesting replies here, definitely an engaging discussion to read through.
Good topic for discussion, I enjoyed reading through the replies.
Feel free to surf to my blog post YJXHFYJNSXZJ
Great site you’ve got here.. It’s difficult to find high-quality writing like yours
nowadays. I truly appreciate people like you!
Take care!!
Linking components in OMT’s educational program ease transitions Ьetween levels, nurturing continual
love for mathematics and examination confidence.
Join оur ѕmall-ɡroup on-siteclasses in Singapore foг tailored guidance іn a nurturing environment thаt builds strong foundational mathematics
skills.
Offered tһаt mathematics plays ɑn essential role іn Singapore’ѕ economic develpment and development, purchasing specialized math tuition equips trainees ѡith thе problem-solving skills
needed to grow in ɑ competitive landscape.
primary tuition іѕ essential foг constructing strength versus PSLE’ѕ difficult questions, such aѕ those on probability and basic
stats.
Personalized math tuition іn secondary school addresses individual finding օut voidss in subjects ⅼike
calculus ɑnd data, preventing tһеm frⲟm impeding O Level success.
Tuition incorporates pure аnd used mathematics flawlessly, preparing pupils for tһe interdisciplinary nature of Ꭺ Lefel troubles.
OMT’s one-of-а-kind approach features a curriculum tһat matches tһe MOE structure ᴡith joint elements, encouraging
peer discussions ⲟn mathematics ideas.
Video clip descriptions аre cleaг and engaging lor, aiding уou comprehend complicated
concepts and lift үour grades easily.
Math tuition ɡrows perseverance, assisting Singapore trainees tɑke on marathon examination sessions ѡith sustained emphasis.
Нere is my web-site: math tuition jc
Smɑll-ɡroup on-site classes at OMT produce ɑ helpful аrea ᴡһere
pupils share math discoveries, firing սⲣ a love fоr the subject that moves them toward examination success.
Enlist todаy in OMT’s standalone e-learning
programs and ѕee yⲟur grades skyrocket tһrough unrestricted access tо hіgh-quality,
syllabus-aligned material.
With math integrated seamlessly іnto Singapore’s
classroom settings t᧐ benefit both teachers аnd trainees, committed
math tuition enhances tһese gains by offering customized assistance fоr continual achievement.
For PSLE achievers, tuition supplies mock tests аnd feedback, helping improve answers fоr maximum marks іn Ьoth
multiple-choice аnd open-ended sections.
Secondary math tuition lays a strong foundation fⲟr
post-O Level researches, ѕuch as Α Levels or polytechnic
programs, Ƅy excelling in fundamental topics.
Resolving individual understanding styles, math tuition guarantees junior
college pupils master subjects ɑt their own speed fօr Α Level success.
Distinctly, OMT enhances tһe MOE educational program tһrough an exclusive program tһаt incⅼudes real-time progression monitoring fⲟr individualized improvement strategies.
Taped webinars offer deep dives lah, furnishing yⲟu with innovative skills for exceptional mathematics
marks.
Ᏼy incorporating innovation, on thе internet math tuition involves
digital-native Singapore students fоr interactive examination modification.
Ηave a ⅼook at my site – online tuition
When I originally commented I clicked the “Notify me when new comments are added” checkbox and now each time a comment is added I get
four emails with the same comment. Is there any way you can remove me from
that service? Appreciate it!
Boa madrugada, guia prático e sem firula copa do mundo 2026. procon dos jogos odds estão boas. Valeu a atenção.
beste basketball nba wetten tipps heute
vibratory polishing
rabona scommesse
my site: Basketball-Wetten.Com
bookmaker wedden 100 promotiecode (Ruby)
I constantly spent my half an hour to read this weblog’s posts all the time along with a cup of
coffee.
My web blog … Web Page
consigli coppa Italia quote Scommesse
csgo wedden tips
my page … Basketball-Wetten.Com
combinaciones casa de apuestas ingreso mínimo 1 euro
(Kaitlyn) deportivas
Halo, ada yang tahu slot tiger? boleh tahu?
what is ante post horse racing (Wilda) racing results today lingfield
I used to be able to find good info from your articles.
ganhar dinheiro apostando
Look into my homepage: basketball-wetten.com
an canadian casino, best no deposit bonus casino usa and poker
competitions uk, or top 20 online casinos usa no deposit
Review my page :: john huxley roulette wheel for sale [Kirk]
Sportwetten öSterreich Rechtslage apps
sport-wetten
Look into my webpage: wettseiten mit bonus ohne einzahlung
uptown pokies australia review, online gambling roulette united
states and canada offshore gambling, or online
how much does it cost to start the casino heist with free signup bonus real money
usa
Interesting discussion, looking forward to reading more replies.
Appreciate all the helpful replies and information shared
in this thread.
Good points being made here, thanks to everyone contributing.
Nice discussion topic, looking forward to hearing more opinions.
Good topic for discussion, I enjoyed reading through the replies.
Look at my blog: Claim your discount
Interesting discussion, looking forward to reading
more replies.
Good conversation here, I’ve learned a few new things already.
Good points being made here, thanks to everyone contributing.
Thanks for sharing your thoughts here, this has been a
useful discussion.
Good topic for discussion, I enjoyed reading through the replies.
Here is my web blog :: Debt
Interesting discussion, looking forward to reading more replies.
Good conversation here, I’ve learned a few new things
already.
Good points being made here, thanks to everyone contributing.
Good forum thread with a lot of helpful and interesting comments.
Appreciate the discussion here, lots of useful information in this thread.
Also visit my web-site: €€€
mgm online gambling stock (Jonah) casino canada real money roulette, how to win on pokie machines usa and casino no deposit bonus codes
canada 2021, or top usa online casinos with no deposit
bonuses
Today, I went to the beach with my kids. I found a sea
shell and gave it to my 4 year old daughter and said “You can hear the ocean if you put this to your ear.” She placed the shell to her ear and
screamed. There was a hermit crab inside and it pinched
her ear. She never wants to go back! LoL I know
this is completely off topic but I had to tell someone!
This is an excellent, an eye-opener for sure! Thumbs up! This is an excellent, an eye-opener for sure! I really like your article.
Thanks everyone for sharing your thoughts and experiences
here.
Interesting topic, curious to see what others think about this.
Interesting discussion topic, looking forward to following this thread.
Nice discussion topic, looking forward to hearing more opinions.
Very informative thread, some great points
being brought up here.
Feel free to visit my web site :: Earn extra income
sportwetten die besten
my web-site :: basketball wetten heute – Lorrie,
Thanks for the clear advice. More at windshield replacement with insurance asheville .
Great weblog! I found out several new tips. I brought tutorials at insurance windshield replacement Charlotte NC 28207 .
I appreciated this post. Check out aftermarket windshield replacement asheville for more.
guia que todo mundo precisa ler. giradas grátis é real. Rivalo tmj
Well explained. Discover more at mobile windshield replacement asheville .
This article brings up some really interesting points about digital privacy and ad tracking. It is a complex topic, but if you want to take a break from the tech news, you can try this game pokelike.
Great tips! For more, visit windshield replacement cost asheville .
This was a fantastic resource. Check out suv windshield replacement asheville for more.
alle sportwetten anbieter
Here is my web blog – sichere basketball wetten, Celinda,
This was highly educational. More at windshield installer asheville .
This was nicely structured. Discover more at oem windshield replacement asheville .
Wonderful tips! Find more at insurance windshield replacement asheville .
Amazing, well written innovations. I can tell that you love to jot down. For more, see emergency auto glass Charlotte NC 28134 .
I’m not sure exactly why but this site is loading extremely slow for me.
Is anyone else having this issue or is it a issue on my end?
I’ll check back later on and see if the problem still exists.
joker online casino canada, best live blackjack sites usa and uk best online slots, or $10 deposit online casino australia
Also visit my site – roulette worst Odds
Useful advice! For more, visit best windshield replacement asheville .
usa online casinos new, $5 minimum deposit casino new zealand
2021 and online casino real money canada, or uk Dice based gambling games license conditions
top new united statesn how to earn real money online without investment casino, bouka pokies and what poker sites are
legal in australia, or $10 deposit online casino australia
aj beuka high stakes poker, no deposit bonus on sign up usa and casino in milwaukee wisconsin, or top online pokies
and casinos real money canada
Check out my homepage – how to count 21
blackjack (Verlene)
australian brewery poker, online slot casino usa and free spins no deposit united kingdom casino, or best online
pokies new zealand casino
my web-site: grubhub blackjack pizza (Audrey)
cahuilla casino for sale in goa (Blake)
anza ca, real money pokies canada app and poker stars uk app, or
is online bingo legal in canada
online horse race betting app
Here is my web-site: uk dog racing results today (https://grayhound-Betting.com/)
Thanks for the great explanation. More info at rear windshield replacement asheville nc .
This was quite informative. For more, visit windshield replacement shop asheville .
This was a fantastic read. Check out same-day windshield replacement asheville for more.
This was a wonderful post. Check out asheville nc windshield replacement for more.
Boa tarde — autoexclusão. abs
I enjoyed this article. Check out mobile windshield replacement asheville for more.
Appreciate the great suggestions. For more, visit fast windshield replacement asheville .
Thanks for the great tips. Discover more at professional windshield replacement asheville .
This is highly informative. Check out windshield replacement shop asheville for more.
Well done! Find more at windshield glass replacement asheville .
Solid write-up on the 20-super-hott welcome bonus — finally a US-focused
review that explains the wagering requirements clearly instead of
just hyping the headline number.
freispiele seriöse casinos ohne mindesteinzahlung [Lisa] einzahlung
bingo das spiel
my web site :: früchte spielautomaten hohe gewinne; https://Safelight.techzenau.com/2025/04/07/gibt-es-blackjack-online-in-deutschland-mit-startguthaben-ohne-einzahlung/,
staatliches casino
Also visit my site blackjack side bets Auszahlung (https://renertschool.ca/elektronisches-blackjack-spiele-und-spiele-2026/)
geradezahlig beim roulette
Have a look at my blog post: Basketball-wetten.com
livescore für sportwetten
Look at my website – wett tipps vorhersagen (http://Gratis-wetten.com/)
casinos casino con crupier en vivo (jwd.Comtnet.com)
san sebastian madrid españa
It’s the best time to make some plans for the future and it is time to be
happy. I’ve learn this put up and if I may just I
wish to recommend you few interesting issues or suggestions.
Perhaps you could write subsequent articles referring
to this article. I desire to read more issues approximately it!
juegos de grand mencey casino tragamonedas gratis por diversion de 5 tambores
que juegos se pueden jugar con cartas Reloj Ruleta De Casino casino
casino online sin registrarse
My web page; casinos En salamanca
casinos online con bonos sin deposito
My webpage; juegos gratis ruleta casino españOl
May I just say what a relief to discover a person that really understands what they are discussing over the internet.
You certainly understand how to bring an issue to
light and make it important. More people should read this and understand this side
of the story. I was surprised you are not more popular given that you most certainly possess the gift.
Hello friends, good paragraph and pleasant arguments commented here, I am genuinely enjoying by these.
What i do not realize is in reality how you are now not really a
lot more smartly-favored than you may be right now. You’re very intelligent.
You recognize thus significantly in terms of this subject, made me for my part believe it from numerous numerous angles.
Its like women and men don’t seem to be interested except it is one thing to accomplish with Woman gaga!
Your own stuffs great. At all times deal with it up!